Applies to: Windows Server 2022, Windows 11, Windows 10, Windows 8.1, Windows Server 2019, Windows Server 2016, Windows Server 2012 R2
Hyper-V is a virtualization technology developed by Microsoft that allows you to create and manage virtual machines on a Windows operating system. Hyper-V is built into Windows 10, Windows 11, and Windows Server 2016 through Server 2022, but it is not installed by default. In this blog post, we will discuss how to install the Hyper-V role on Windows 10, Windows 11, and Windows Server 2016 through Server 2022 using PowerShell.
Before we begin, it is important to note that in order to install the Hyper-V role, you must have a 64-bit version of Windows and a CPU with virtualization capabilities. You should also ensure that virtualization is enabled in your computer’s BIOS settings.
Installing Hyper-V on Windows 10 and Windows 11
To install the Hyper-V role on Windows 10 or Windows 11 using PowerShell, follow these steps:
- Open PowerShell as an administrator. To do this, click on the Windows start button, start typing out PowerShell, right click on the result and select “Run as Administrator”
- In PowerShell, type the following command and press Enter:
Enable-WindowsOptionalFeature -Online -FeatureName Microsoft-Hyper-V -AllThis command will enable the Hyper-V role on your computer. Once completed, restart your computer. Once your computer has restarted, you can launch the Hyper-V Manager by searching for “Hyper-V Manager” in the Start menu.
Installing Hyper-V on Windows Server 2012 R2 through Server 2022
To install the Hyper-V role on Windows Server 2016 through Server 2022 using PowerShell, follow these steps:
- Open PowerShell as an administrator
- In PowerShell, type the following command and press Enter:
Install-WindowsFeature -Name Hyper-V -IncludeManagementToolsThis command will install the Hyper-V role and the Hyper-V Management Tools. Once completed, restart your server.
Installing Your First VM in Hyper-V
Now that you have Hyper-V installed, lets setup your first Virtual Machine. In this example, we will be using Ubuntu Desktop 20.04 LTS.
First, download and save the ISO from https://ubuntu.com/download to your hard drive.
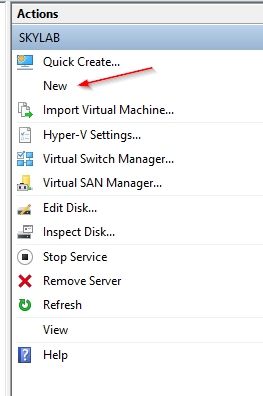
Next, open Hyper-V Manager by searching for “Hyper-V Manager” in the Start menu.
Once you have launched the Hyper-V Manager, click on “New” in the right-hand pane, and then select “Virtual Machine” from the dropdown menu.
The New Virtual Machine Wizard will open. Click “Next” to begin.
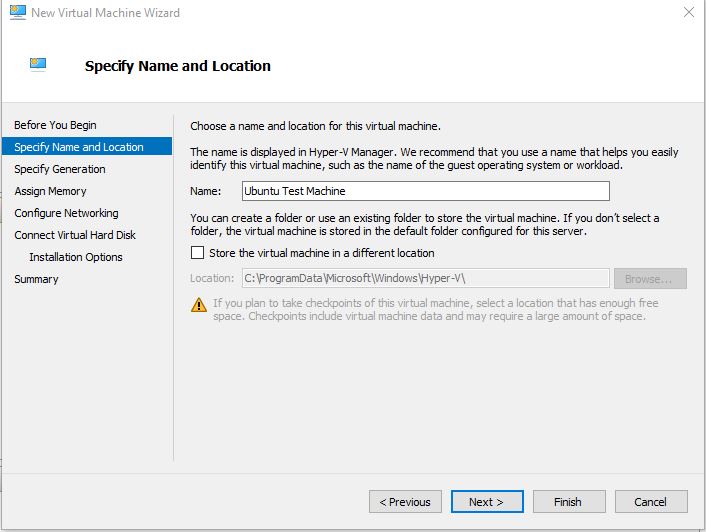
In the next window, enter a name for your virtual machine, such as “Ubuntu VM”, and choose a location to store the virtual machine files. Click “Next”.
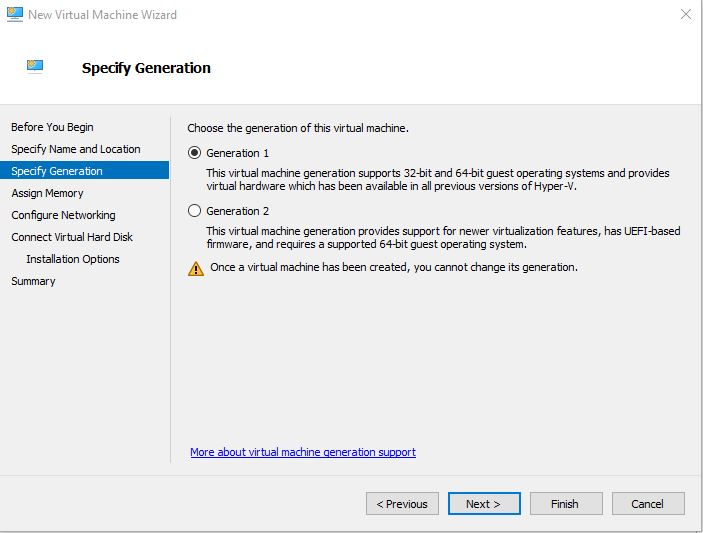
Choose “Generation 1” for the virtual machine generation, and click “Next”.
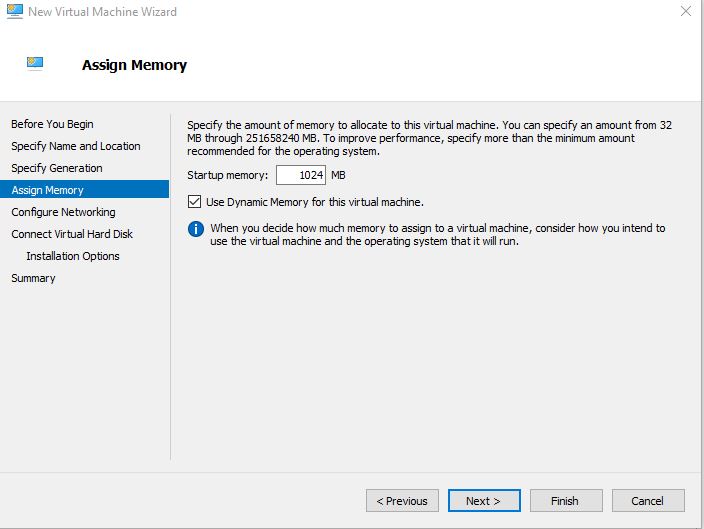
Choose the amount of memory you want to allocate to the virtual machine. For Ubuntu, it is recommended to allocate at least 1GB of memory. Click “Next”.
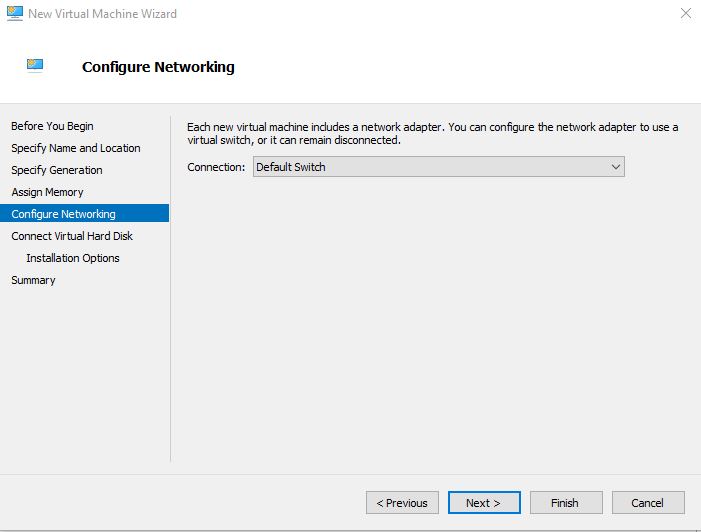
In the “Configure Networking” screen, choose “Default Switch” for the virtual switch. This will allow the virtual machine to access the internet through your physical network adapter. Click “Next”.
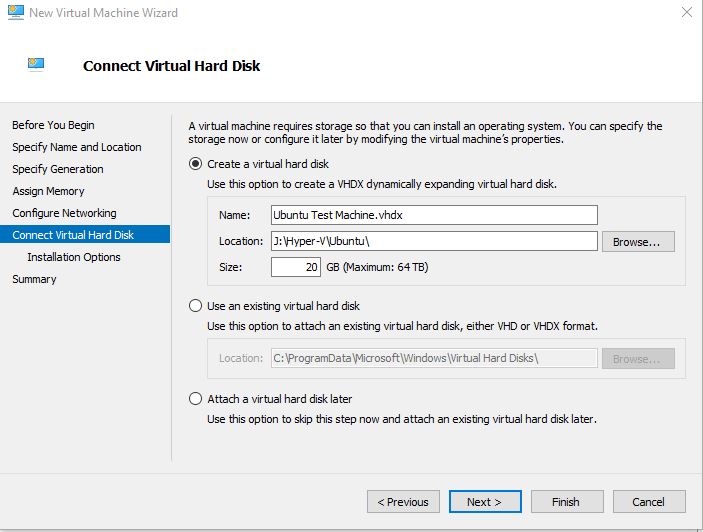
Choose a name and location for the virtual hard disk, and choose the size of the virtual hard disk. It is recommended to allocate at least 20GB of storage space for Ubuntu. Click “Next”.
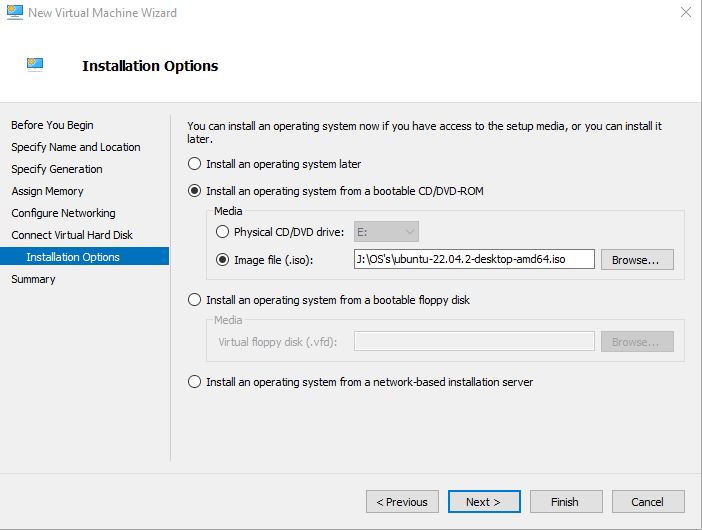
In the Installation Options settings, select “DVD Drive” under “Hardware”, and then click on the “Image File” option. Browse to the Ubuntu ISO file you downloaded and select it. Click “Next”.
Review the summary and click “Finish”.
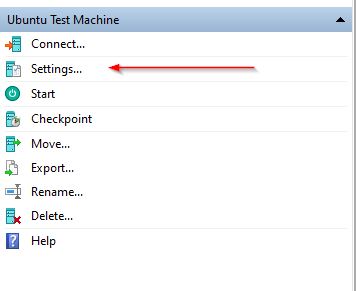
Before powering on the VM, you will need to select which virtual switch the VM will run through.
To do this, click on “Settings” in the right window pane:
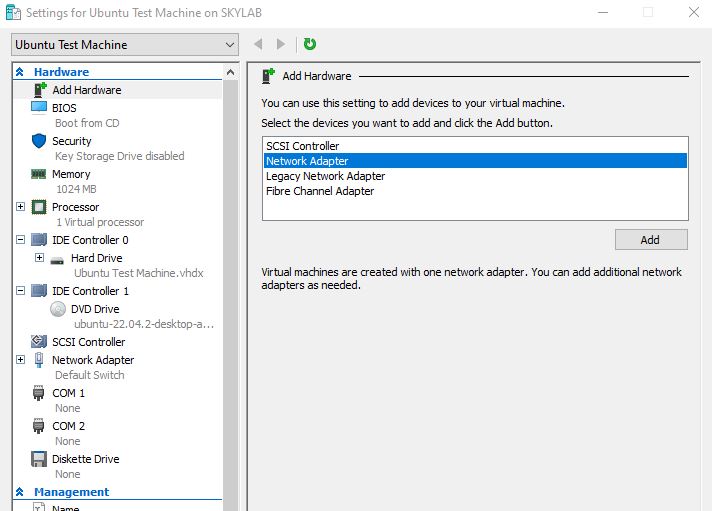
Under the “Add Hardware” section, select “Network Adapter” and click the “Add” button:
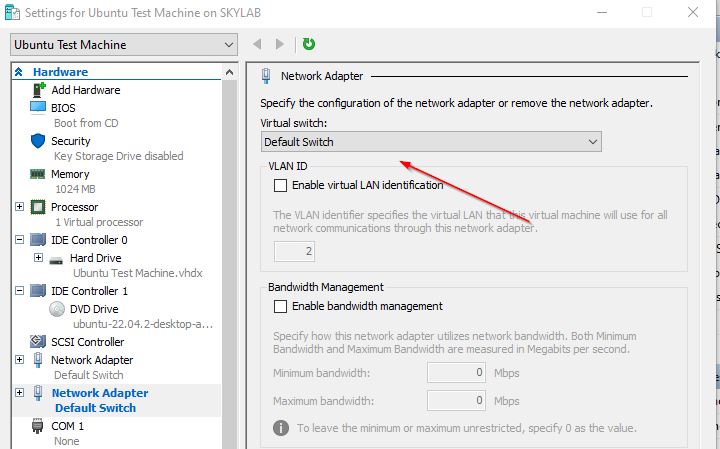
From the dropdown menu under “Virtual Switch”, select “Default Switch”, press “Apply”, then press “Ok”.
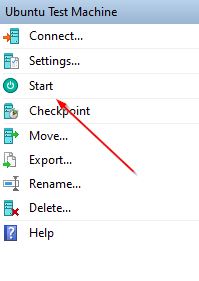
You can now power on the VM by clicking on “Start” in the window to the right:
Installing the Hyper-V role on Windows 10, Windows 11, and Windows Server 2016 through Server 2022 using PowerShell is a quick and easy process. By following the steps outlined in this post, you can enable virtualization on your Windows operating system and start creating and managing virtual machines with Hyper-V.